
The BPGA (Protection and Power Management Unit) centralizes electrical distribution in vehicles from the Stellantis group. Located under the hood, near the battery, this module replaces the old fuse boards by integrating electronic protections against surges and short circuits. When it malfunctions, symptoms range from complete failure to erratic warning lights on the dashboard, with no apparent mechanical cause.
BPGA References and Compatibility Between Stellantis Brands
A point rarely addressed in diagnostic guides: since the widespread adoption of updated CMP and EMP2 platforms, several BPGA references are shared among Stellantis brands. The same physical unit can equip a Peugeot 208 II, an Opel Corsa F, or a Toyota ProAce City, but carry a different catalog reference depending on the manufacturer.
Recommended read : How to easily find the email address and insurance number for Pacifica?
This rationalization has a direct impact on locating fuses. The assignment of high-power locations (trailer pre-equipment, additional heating) varies from one reference to another, even if the unit appears identical. A diagram found online for a Peugeot 308 III may not necessarily correspond to that of a Citroën C4 III, even though the installed BPGA is physically the same.
Before any intervention, it is essential to identify the exact reference engraved on the unit and cross-reference it with the Stellantis ServiceBox or TecDoc catalogs. Relying on a generic diagram risks testing the wrong fuse, while testing the BPGA on Les Voitures Anciennes helps to find reliable correspondences between references and locations.
See also : The best solutions to easily create and manage your professional website
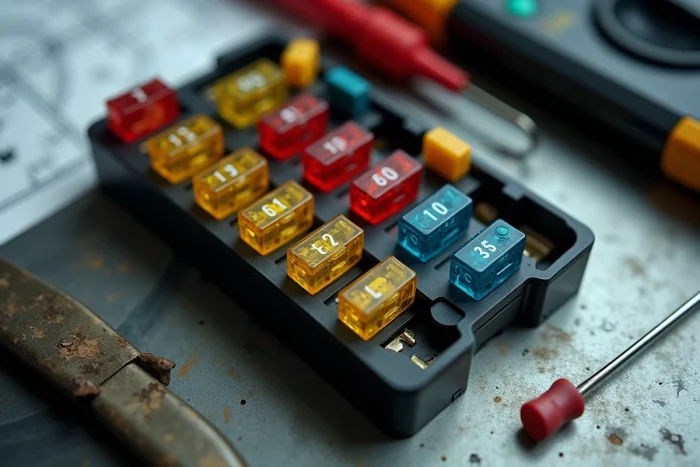
BPGA Fuses: Identification and Verification with a Multimeter
The BPGA integrates two types of protections: standard fuses (blade) for secondary circuits and high-power fuses for primary consumers (starter, alternator, heating). Blade fuses can be checked visually or with a simple continuity tester. High-power fuses require a multimeter.
Testing Protocol with a Multimeter
The test does not require professional equipment. A standard multimeter is sufficient, provided a few steps are followed.
- Turn off the ignition and disconnect the negative battery terminal before working on the unit. This precaution avoids any risk of short circuit during handling.
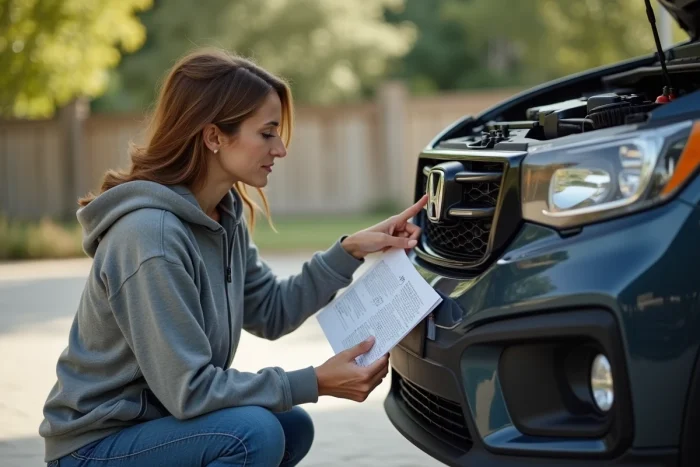
- Locate the BPGA under the hood (usually mounted on or next to the battery) and remove its cover. The assignment of each location is printed inside the cover or on a label affixed to the unit.
- Set the multimeter to continuity mode (diode/buzzer symbol) and place the probes on the two terminals of the fuse without removing it. A beep confirms that the fuse is conducting. No beep: the fuse is blown.
- For high-power fuses, switch to DC voltage mode (DC voltmeter), reconnect the battery, and turn on the ignition. Measure the voltage upstream and downstream of the fuse: a significant difference indicates a faulty fuse or abnormal resistance in the circuit.
If all fuses are intact but the problem persists, the fault is likely in the internal electronics of the BPGA itself.
BPGA Failures Related to Stop and Start and Micro-Hybridization
Vehicles equipped with an enhanced Stop and Start system or a BSG starter-generator put much more strain on the BPGA than a conventional vehicle. Each automatic restart at a red light generates a current spike that the unit must manage. On an urban route with frequent stops, these repeated current spikes accelerate the wear of the internal components of the BPGA.
Drivers who primarily drive in the city are therefore more exposed to early failure. The typical symptom: the Stop and Start system randomly deactivates, the message “Battery Charging” appears even though the battery is in good condition, or the vehicle refuses to restart after a prolonged stop.
Differential Diagnosis: BPGA or Battery?
Confusion between battery failure and BPGA failure is common. A faulty BPGA can drain a new battery within a few days due to a permanent leakage current. To distinguish between the two:
- Measure the battery voltage with the engine off: a correct value (around 12.6 V on a charged battery) eliminates the diagnosis of a weak battery.
- Measure the resting current with a clamp ammeter on the negative cable, vehicle locked and in standby for at least an hour. An abnormally high resting current points to a consumer that does not go to sleep, often controlled by the BPGA.
- Check for fault codes with a compatible diagnostic tool (PSA/Stellantis protocol). The code B1624 frequently appears in case of BPGA faults on EMP2 platforms.
Repair or Replacement of the BPGA Unit: Criteria for Choice
Replacing a BPGA with a new part requires reprogramming with a manufacturer diagnostic tool, as the unit must be paired with the vehicle’s BSI (Intelligent Service Box). Without this step, the new module will not communicate properly with the rest of the electrical network.
Specialized companies offer BPGA repair services (replacement of internal electronic components, re-soldering of relays). Repair retains the original programming, which avoids the reprogramming step and reduces overall cost. This option is relevant when the fault comes from a blown relay or a weakened solder, which represents the majority of cases encountered.
Bypassing (short-circuiting the BPGA) circulates as a tip on forums. This practice removes all electrical protection from the vehicle. In case of a short circuit on a consumer, the wiring harness or an ECU may be irreversibly damaged. Bypassing is only a temporary fix for a few kilometers to reach a garage, not a sustainable solution.
The choice between repair and replacement depends on the condition of the unit and the model in question. On recent platforms where BPGA units are rationalized between brands, the availability of new parts has improved. On older models (308 II, 3008 I), repair often remains the quickest route, as lead times for new parts from Stellantis can be long.